By the time you are reading this, my colleague John Nelson and I will have presented to a bunch of fantastic creatives at Adobe MAX 2019 about making maps as designers. Designers make gorgeous maps, because oftentimes they don’t confine themselves to super strict ideas of what a map should look like. Plus, well… they’re designers!
During our presentation, John and I shared a host of different resources and links. Here is the list of resources that I shared to help you get started building some fantastic maps! This list contains some map-making tutorials, including one I demoed to the MAX crowd during our presentation. You’ll also find some useful links for getting started with the tool that I used to make that map – ArcGIS Maps for Adobe CC. Also, if you’re getting started with this tool, you may find this list useful, whether you’re new to mapping or have been at it for a while. So I figured why not share it with everyone? Here you go, mappers:
1. Downloading Maps for Adobe
In the tutorials I demoed, I used ArcGIS Maps for Adobe CC (Maps for Adobe) to build by maps. A great part of this tool is that it is free, and anyone can download it today and start using it in Adobe Illustrator and Photoshop.
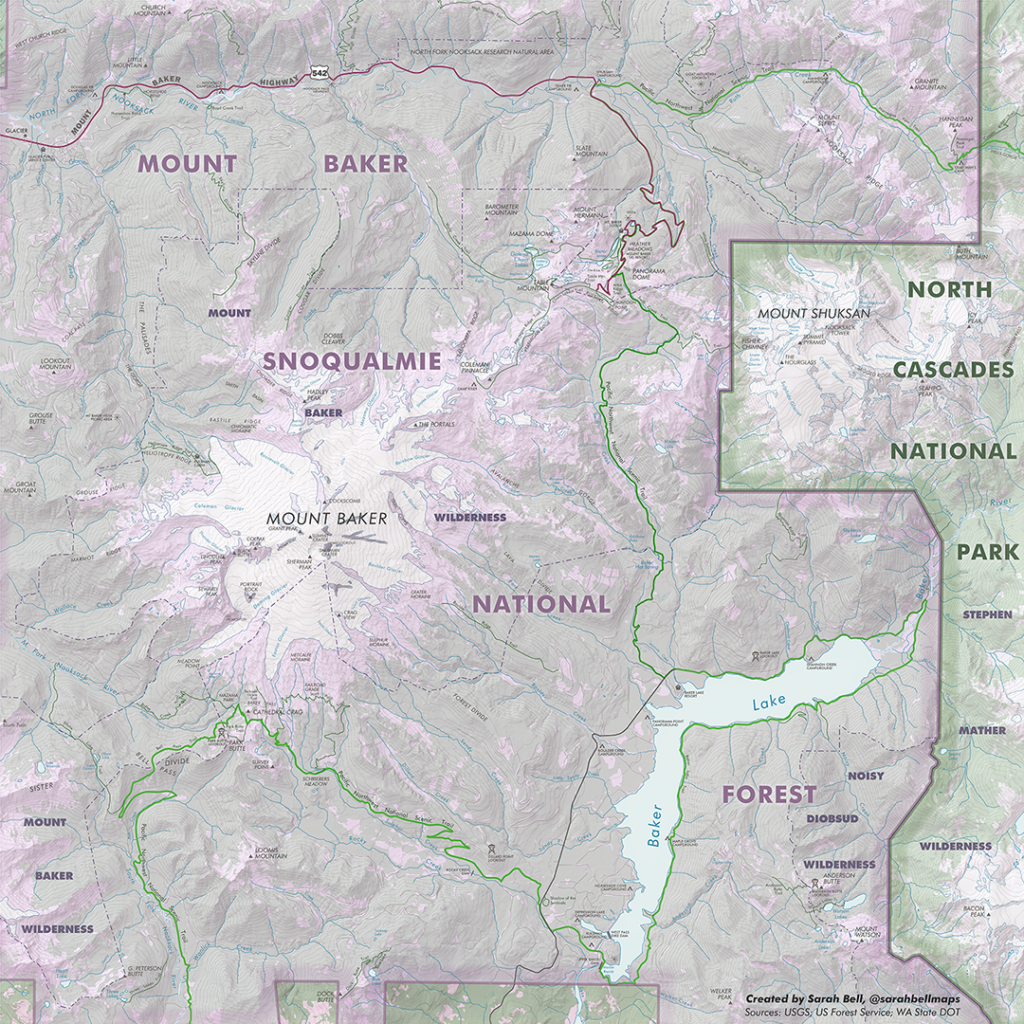
2. Mount Baker Map Tutorial
During our talk, I mentioned two tips for finding good map data for new mappers. One of those tips I shared is searching directly from that mapping tool called Maps for Adobe. This Mount Baker National Forest map that I made was created entirely inside Adobe Illustrator, by accessing all the data without having to ever leave Illustrator. This tutorial shows you all the steps for making your own map with access to this data!
2. Finding & Adding Map Content
As all demos go, step-by-step processes are important to share and describe, but it isn’t always easy to recall each step after the presentation is over. One of those steps I shared is adding content to a map with the mapping tool I used during the demos. This link brings you to some helpful documentation that some really nice people have put together to describe the different types of data you can add to your maps Adobe Illustrator. Also, this tutorial walks you through finding and adding map to create National Park Service-inspired recreation maps.

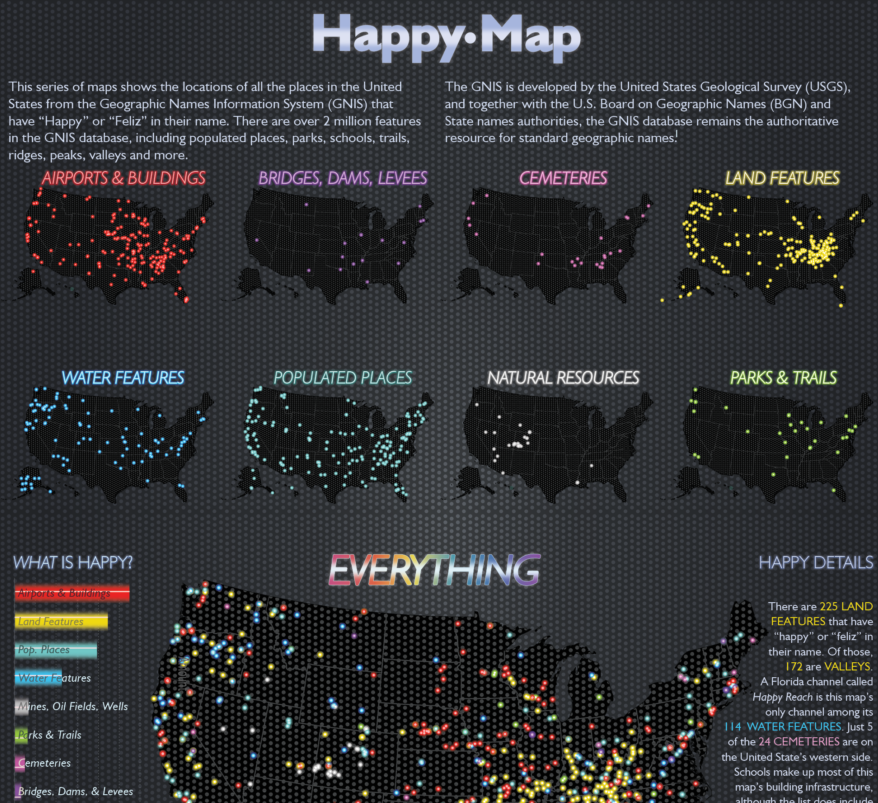
3. A Happy Map. A Tutorial
My first demo is constructing a map from USGS’ Geographical Names Information System (GNIS) dataset. I decided to take all the locations with “happy” and “feliz” in their names and put them on a map. This tutorial that I’m also posting today walks readers through all the steps that I shared in the demo, as well as additional steps for sifting through that large dataset to get the locations that you want on your map (how to select the right locations in Excel, e.g.). Also, remember that most of these GNIS points are already organized and ready to add to your Illustrator map without having to download them (hint: follow the Mount Baker Map tutorial’s steps to discover an easy way to put GNIS data in your map using Maps for Adobe).
4. More Mapping Tutorials!
I work with an amazing team of folks developing this mapping tool. So I get to write a lot of tutorials about it. This link will bring you to a lot of different step-by-step map-building tutorials that I wrote for people who are interested in using this particular mapping tool.
If you’re new to mapping (whether or not you were at the presentation), welcome! I hope to see some of your cartographic creations.
‘See all you mappers next time!