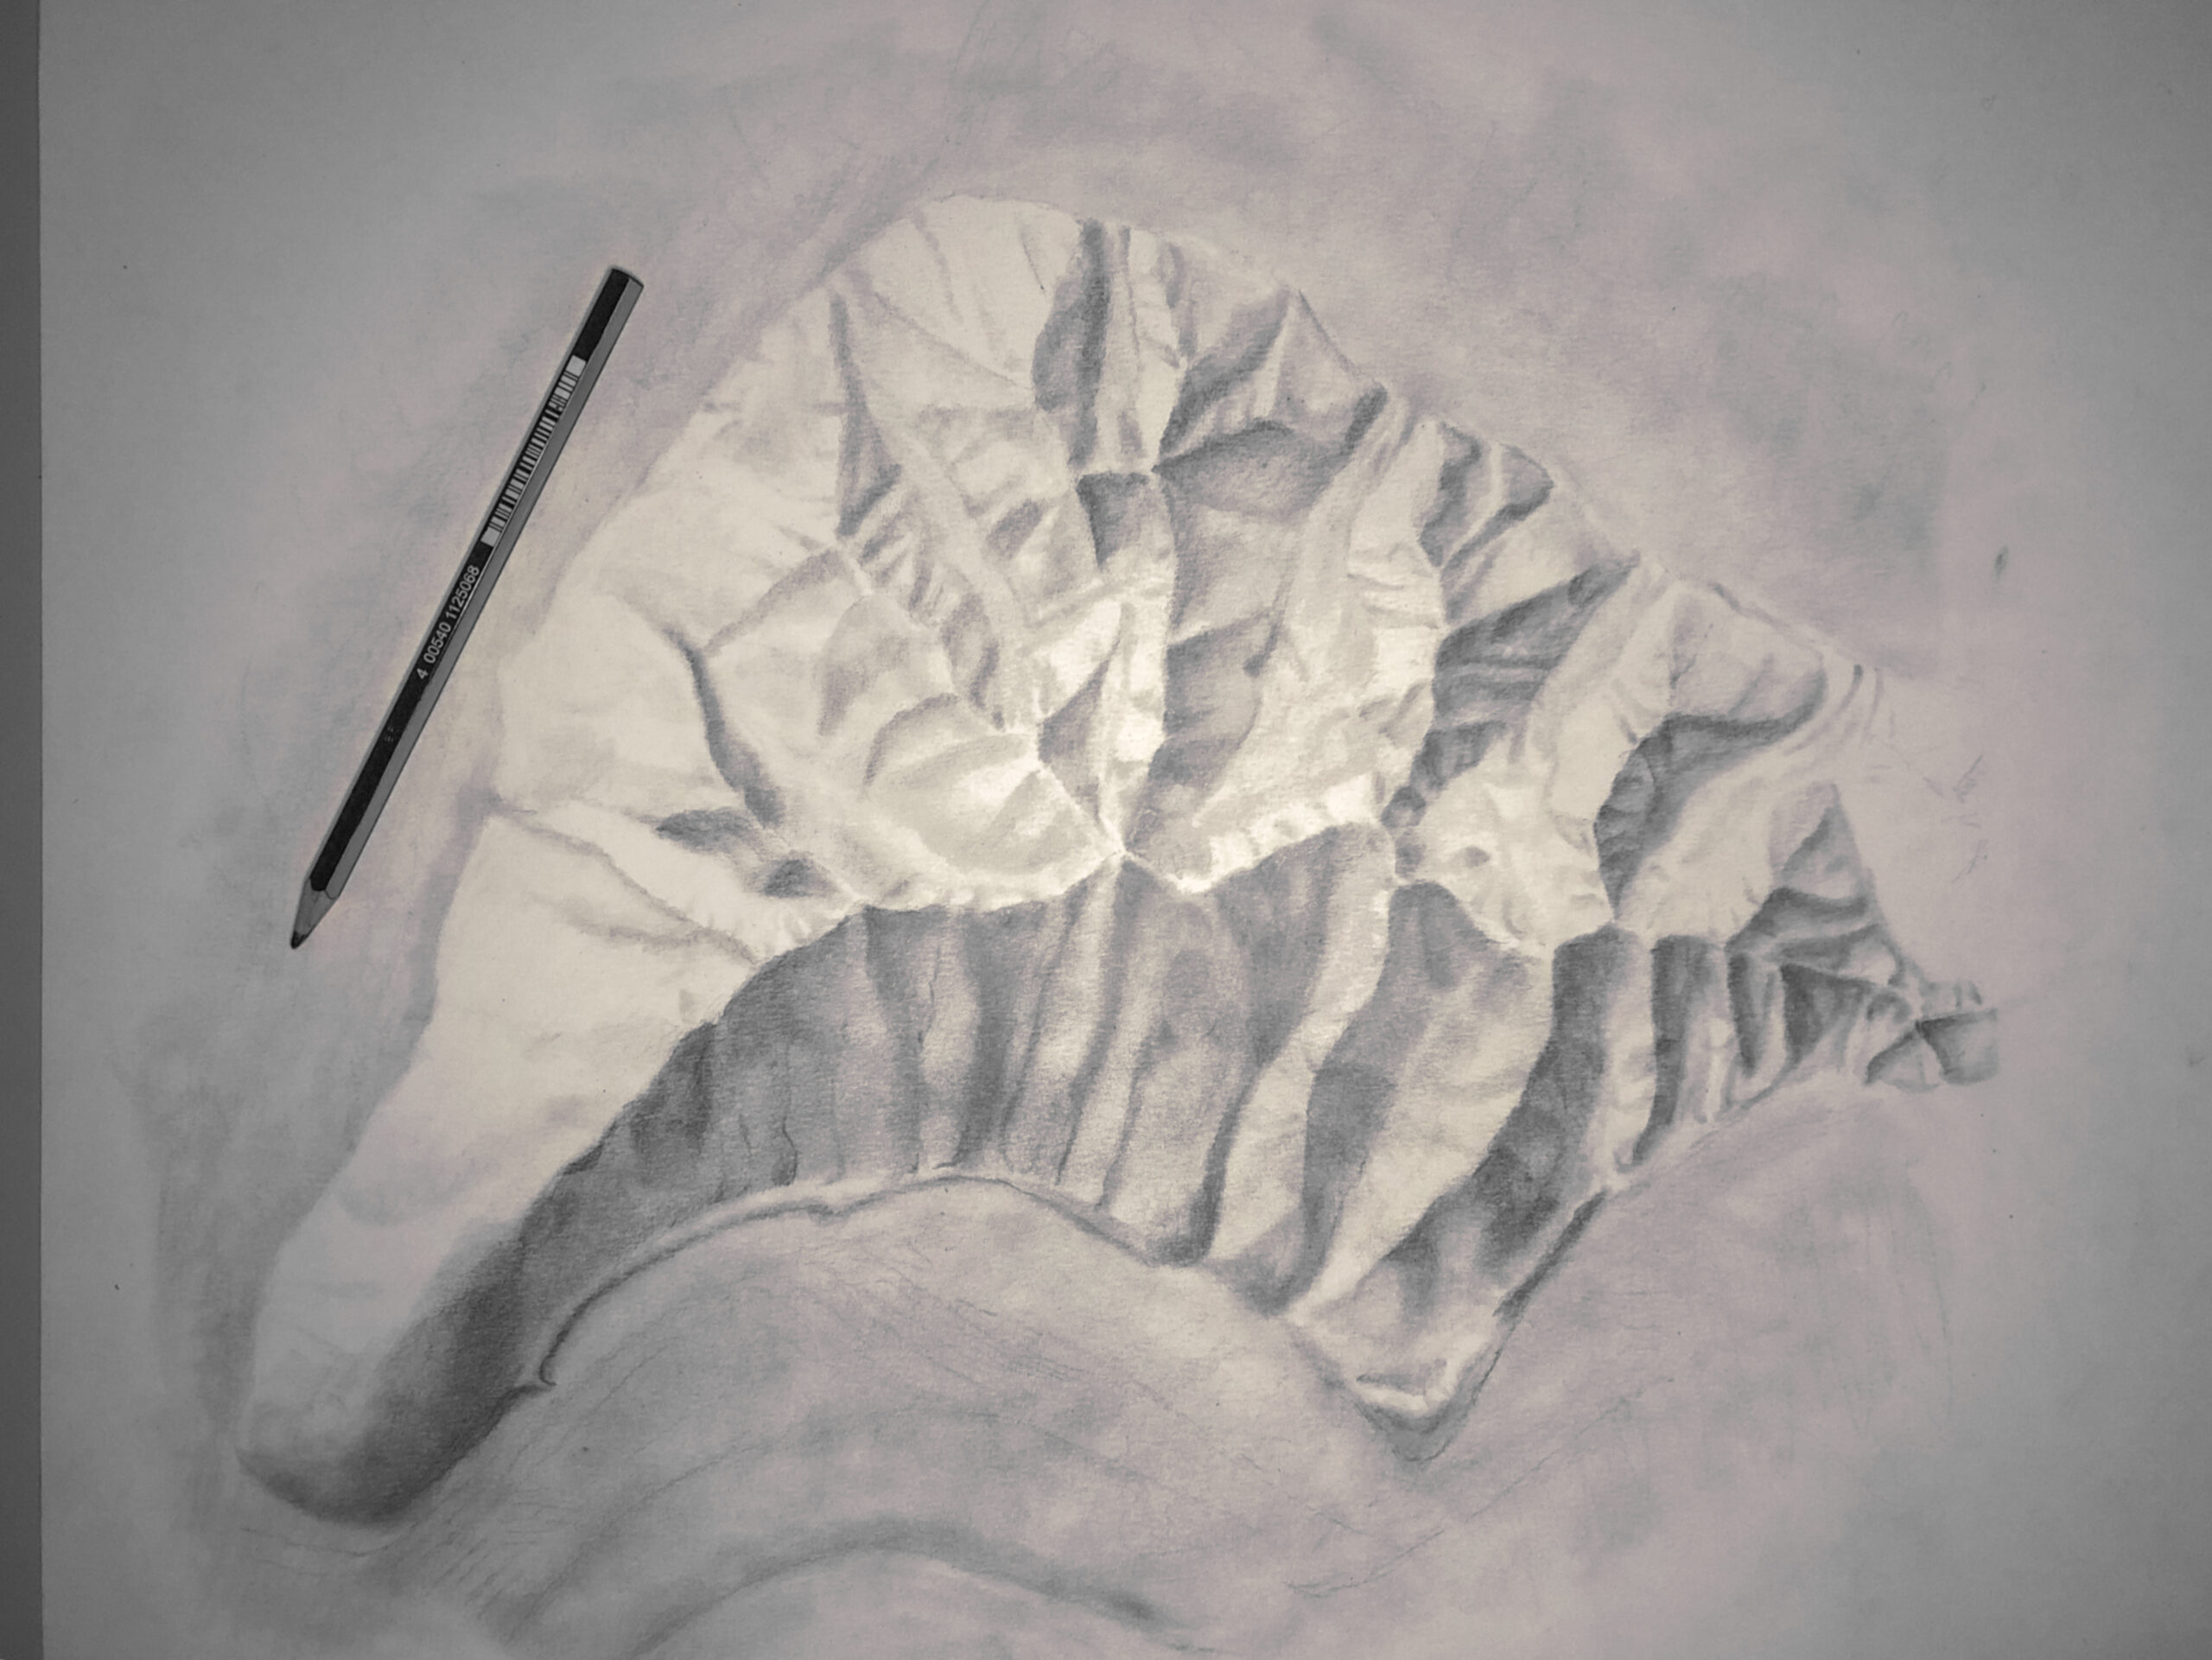
Step 5. Blend!
This is when all the work starts paying off and your terrain starts popping. I spend nearly as much time blending hand-drawn shaded relief as I do putting graphite on the page. I blend in tight circles just basically drawing with the stump. I’m constantly referring to my reference image (aptly named “reference,” I suppose), so that I don’t blend in too much graphite in the brighter areas. As you pick more and more graphite up from the page onto your blending stump, you can actually even begin to draw with the stump. In this first step, you’re not concerned with getting every shady nuance. You are just differentiating the shadier parts from the lighter parts.
The specifics of blending
- Tip! Make sure there are not any hard pointy artifacts on your stumps. Many times I’ve blended with a stump that has a splinter or some other tiny-but-evil object on it, thus scratching my paper. These scratches are hard to cover up in a drawing.
- Start off with light pressure, but you also may find that medium, and even medium-firm, pressure will be necessary, especially in iterations 2 and above. It depends on the pencils and paper you used, your terrain, and your personal objectives.
- Start with tight circles for a smooth gradient. However, once you get the hang of it, especially in blending iterations 2 and above, you will want to blend according to the contour of your terrain. For example, if a feature is very obviously linear, like the gorgeous fluid stretch marks of large glaciers, it may be appropriate to drag your stump in long lines. Or if your focusing on a landscape of lumpy drumlins, maybe you’ll want to use a softer rounded motion.
Again, here are two videos, the first is the first blending iteration of that same Chugach range section shown in step 4, and the second is the second blending iteration of that same drawing.


